
Baked Apples with Maple Oat Crumble
I LIVE for all things pumpkin in the fall. And don’t get me wrong, give me some Pumpkin Protein Pancakes and Pumpkin Donut Bites and I’m the happiest person! However, I also think apples deserve a place in the spotlight. Some would even say that they’re the superior fall flavor, and while I’m not sure if I totally agree (I love them both equally!), I do know that this healthier apple crumble is superior in so many ways!
For starters, the apples are stuffed with the crumble mixture and then baked (rather than sliced and topped). Thanks to the simple ingredients, the sweetness and the freshness of the fruit really shines through, amplified by that yummy maple almond butter filling! My kiddos love it, and it’s so good topped with ice cream. This is truly one of my favorite new fall desserts!
Why You’ll Love This Recipe
- Refined Sugar-Free – Maple syrup is the only sweetener used. Thanks to the nutrients from the apples and the fiber from the oats, this healthy apple crumble is so nutritious that you can even enjoy it for breakfast!
- Dairy-Free/Gluten-Free – As written, this recipe is naturally gluten-free, dairy-free, and vegan. It can easily be made nut-free, too, for a treat everyone can enjoy. Just make sure to double-check the ingredient lists!
- Sweet, Spiced Fall Flavors – That apple spice goodness is next-level in this recipe! Along with a touch of nutty maple flavor, I could not be more obsessed.
- Versatile – I like to keep things simple, but the filling ingredients can easily be mixed and swapped for any cravings.
- Family-Friendly – One batch makes up to 4 servings, and it can easily be doubled or tripled with hardly any extra work.
RELATED: Healthy Apple Crisp Recipe

Ingredients
One of the best things about this baked apples recipe is that it only uses six simple ingredients, most of which I’m willing to bet you already have in your kitchen. Here’s everything you’ll need:
- Apples – I like to use Honeycrisp apples for a sweet taste. Look for in-season apples that are large and fairly equal in size for easy stuffing and even baking.
- Rolled Oats – Old-fashioned rolled oats are best. Do NOT use quick oats or steel-cut oats, or the texture won’t be the same. Look for certified gluten-free oats, if needed.
- Maple Syrup – This sweetens the filling and creates an almost caramelized effect. Honey will also work.
- Almond Butter – Adds flavor and a boost of fiber and healthy fats. Feel free to use peanut butter, cashew butter, or even sunflower butter if you need to keep your baked apples nut-free.
- Coconut Oil – I love using coconut oil in healthy fall desserts, but regular or vegan butter works great, too!
- Cinnamon – A dash adds depth and warmth and enhances the natural sweetness of the dessert, creating a classic fall taste.
The Best Apples for Healthy Baked Apple Crumble
As mentioned, I prefer Honeycrisp apples. However, really any apple variety will work for this recipe. Some popular options include:
- Granny Smith – A classic choice for baking! Their tartness balances the sweetness of the crumble filling nicely.
- Pink Lady – A firm apple with a sweet-tart flavor that adds brightness to each bite.
- Fuji or Gala – These are great if you prefer a sweeter crumble with less tartness.
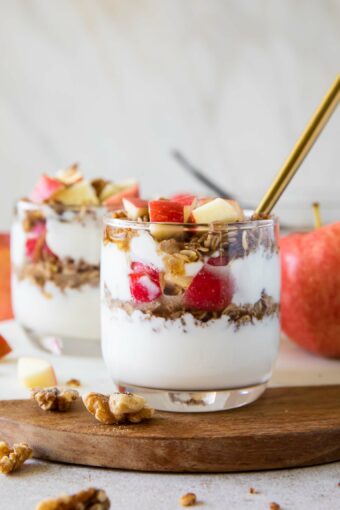
You’ll Also Love: Apple Crumble Parfaits

How to Make a Better-for-You Baked Apples Recipe
This healthy apple crumble recipe couldn’t be easier to make! All you need is a sharp knife, a spoon, and a baking dish. Here’s how to prepare healthy baked apples:
- Prepare the apples – Slice off the top of the apples. Then, carve out the center, similarly to how you could carve a pumpkin. I like to use a spoon for this step!
- Mix the filling – Stir all the crisp filling ingredients in a bowl, coating the oats completely.
- Fill the apples – Spoon the mixture into each apple, filling them all the way to the top. Then, place them in a baking dish, and add a few tablespoons of water to the bottom of the pan.
- Bake – Transfer the baking dish to the oven, and bake until the apples are golden brown and tender. Be sure to cover them with foil halfway through for best results!


Skip the Filling, and Make Plain Baked Apples
I often make baked apples without the filling to serve as a snack or dessert! For this, I typically slice the apples into strips or cubes to make baking fast and eating easier. Here’s how I do it:
- Prepare the apples – Slice the apples into thin strips or cubes. I like to leave the skin on, but you can peel the apples if preferred.
- Season – Toss the apples with coconut oil, maple syrup, a squeeze of lemon, and cinnamon.
- Bake – Arrange the apples in a single layer in a baking dish, and bake until golden brown and soft. Enjoy warm!
Tips
- Be Careful When Hollowing – Spoon out as much of the apple filling as you can, but be careful not to go through the bottom! We want enough of the apples left so they hold their shape and the filling doesn’t ooze out.
- Save the Scraps – Don’t throw out the apple filling! Enjoy them raw, steam them, or sauté them for quick snacks. My kids love them on their own, but they’re also great for applesauce or even as a topping in these Apple Pie Protein Pancakes.
- Make the Apples Easier to Eat – Slice or dice the apples, arrange them in an even layer in a baking dish, add a few tablespoons of water, and sprinkle the crumble mixture on top (making sure to cover them). Then, bake as usual, and serve the mixture like a dessert casserole.

Variations and Topping Ideas
- Nuts – Add extra crunch by stirring chopped pecans, walnuts, or sliced almonds into the oat crumble mixture.
- Dried Fruit – Enhance the sweetness by including raisins, dried cranberries, or chopped dates in the filling.
- Spice – Add to the cinnamon with pumpkin pie spice, nutmeg, allspice, or cardamom for extra depth.
- Fruit – Try using pears instead, slicing them in half and scooping out the filling for a unique twist.
- Toppings – Serve your baked apples with vanilla Greek yogurt for protein, Healthy Homemade Granola, vanilla ice cream, Greek yogurt ice cream, whipped cream, caramel or chocolate drizzle, or an extra spoonful of honey.
How to Store
Fridge – On the off-chance you have leftovers, let your stuffed apples cool completely. Then, transfer them to an airtight container and store them in the fridge for up to 3-4 days.
Freezer – Wrap each apple with plastic wrap, and place them all in a freezer-safe bag. Freeze for up to 2 months.
Serve – Warm thawed apples in 30-second increments in the microwave. Or, bake from thawed or frozen at 325°F just until heated through. They’re still so good!
More Better-For-You Desserts
- Peanut Butter Chocolate Healthy Donuts
- Frozen Banana Snickers
- Protein Reese Cups
- Almond Joy Chocolate Covered Dates
- High Protein Brownies
- Healthy Tahini Salted Caramel Truffles
Healthy Apple Recipes for Fall
- Apple Cinnamon Overnight Oats
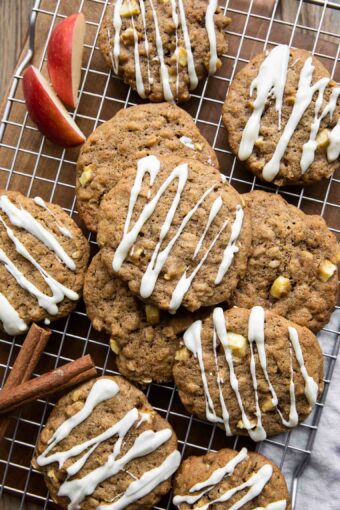
- Apple Cinnamon Cookies
- Mini Apple Pies (Gluten-Free)
- Chocolate Covered Apples
- Cinnamon Streusel Apple Baked Oats
- Maple Apple Spice Gluten Free Granola
Want to save this recipe? Enter your email below and I’ll send the recipe to your inbox. Plus you’ll get new healthy recipes every week!


Baked Apples
Video
Equipment
Ingredients
- 4 medium honeycrisp apples
- 1 cup rolled oats
- 1/4 cup maple syrup
- 1/4 cup almond butter
- 3 Tablespoons coconut oil (melted)
- 2 Tablespoons ground cinnamon
Instructions
- Preheat the oven to 350 degrees F.
- Cut off the tops of each apple.
- Carve out insides of each apple (this works best with a spoon).
- Mix the oats, maple syrup, almond butter, coconut oil, and cinnamon together.
- Fill each of the apples with the crumble and place in a baking dish with 3-4 Tablespoons of water on the bottom.
- Bake for 40-45 minutes, covering halfway through and baking until tender.
- Add any toppings you want and enjoy!
Notes
- Tip: I like to save the carved out insides of the apples and steam them for the kids! You could also make apple butter with them.
Elaine Curtis says:
I think your recipes look great. I’m gonna try them thank you.
Jar Of Lemons replied:
Thanks, Elaine. Enjoy!